What Is EndNote?
EndNote is a software program that allows you to manage your references. You can store, sort, and search within references you have either added manually or imported from a database, and share these references with other users.
It can also help you format your citations and build a bibliography in your chosen reference style.
! Note: You must always check the information entered into your EndNote library is complete and accurate, and check that the output / references are correct according to the style required. Downloaded citations are unlikely to be 100% accurate. Refer to the ECU Referencing library guide for guidance on constructing references in APA style, and links to information about other common referencing styles.
If you take the time to learn how to use EndNote effectively, it can be a valuable tool to save you time and effort, and help you build a library of material that you can use throughout your studies.
Read on to learn where to begin.
Download EndNote
To install EndNote on your personal computer, download the latest version of EndNote for Windows or Mac from the ECU IT Services software download service (link can be found in the installation instructions below). You will need your ECU Login to download the software, and you may need to create a user profile if you have never used this service before. Follow the instructions below to install EndNote.
To install on a Windows computer, you must move the installation files out of the zip folder you downloaded. If you do not do this, you will not get the full version of EndNote. Follow the instructions step by step:
- Download the appropriate file from the Software Service link and open the downloaded zip folder. Do NOT try to run the installation from this folder; if you do, the ECU EndNote license will not be applied.
- Drag or copy both the EN21Inst.msi and the License.dat file to your desktop and install from this location.
- Ensure you have quit all Microsoft Office applications, especially Word.
- Run the installation from your desktop, following the prompts. This will ensure that EndNote installs with the product key.
This video will show you the steps to installing EndNote on a Windows computer, or follow the full instructions (login required): EndNote 21 Windows Installation Instructions.
Why is EndNote Asking for a Product Key?
If you are being asked for a Product Key, the software has not installed correctly. It is likely that the file extraction step was missed. You must unzip/extract the downloaded file for the installation to work correctly. To resolve this issue:
- You may need to uninstall EndNote: Go to Control Panel > Programs and Features. Select EndNote and click "Uninstall".
- Download and extract the files (If unsure, please watch the install video to help you follow this step correctly):
- Open the downloaded Endnote21.zip file (usually in downloads) and drag the EN21Inst.msi and License.dat files to the desktop.
- Double click on the EN21Inst.msi file on the desktop to open the unzipped/extracted version and begin installation.
- Follow the on-screen prompts to complete the typical installation.
To install EndNote on Mac, download the appropriate installer file from the Software Service link and open it. Ensure you have quit all Microsoft Office applications, especially Word. Double-click on the EndNote icon to begin the installation process. Make sure you read all pop-ups carefully and only install apps that you have downloaded from institutions or companies you trust.
The first time you open EndNote, it may look like it didn't install properly. If EndNote is in your Dock, click on it. The menu bar at the top of your screen should change to the EndNote menu. Choose File > New and follow the steps below to create a new library.
For full instructions (login required): EndNote 21 Mac Installation Instructions.
If you are updating an older version of EndNote, you may need to uninstall the older version before you install EndNote 21. Before you uninstall or update EndNote, open your current library or libraries, and create a compressed backup - just in case anything goes wrong.
Getting Started with EndNote
First, download EndNote. If you are using a university computer, it may already be installed.
Once you have EndNote installed, follow the basic instructions below to set up, manage, and add references to your EndNote library.
For an overview of these steps, including troubleshooting tips and things to watch out for, download our EndNote 20 workbook PDF. If you prefer a live demonstration, our workshops page has a video recording and a schedule for upcoming workshops.
- EndNote 20 workbookWork through everything you need to know to get started using EndNote.
- EndNote 20 workbook (Mac)Work through everything you need to know to get started using EndNote on Mac.
Note: EndNote relies on the user to input all details fully and accurately, and to check that the output is correct. Refer to the Referencing guide for guidance on constructing references in APA style, and links to information about some other common styles. You must always check the information entered into your EndNote library, and check the references it produces.
Create your library. Your references will be stored as records in an EndNote library.
- Open EndNote 20
 .
. - Click the button to Create a new library. Alternatively, from the menu bar, select File > New.
- Select where you would like to save your library. This should be on the hard drive of your computer. Do NOT save your working library on a cloud drive such as Box, OneDrive, or Google Drive. These are good locations to store compressed backup copies, but will corrupt an active library over time.
- Give your library a meaningful name (not "My EndNote Library") and click Save.
This will open an empty library ready for you to add references.
Some points to remember when using EndNote:
- An EndNote library is independent of the EndNote program, in the same way a Word document is independent of the Word program. You can save your library in a different location to the software, but you will need EndNote to be installed on your machine to open your EndNote library.
- When you create a library, a library file (.enl) and a .Data folder will be created in the same location with the same name. Keep .enl file and the .Data folder in the same folder location, with the same name, if you move your library.
- Cloud storage can corrupt your EndNote library over time, and cause it to stop working properly or at all. If you do not have access to stable storage space on a single device, a USB or portable hard drive may be used as long as it does not automatically save or update. If you need to use your library on multiple devices or wish to share your library with a group, you should use EndNote Online.
Add references to your EndNote library. You can add references manually or import references downloaded from databases.
Manual Reference Entry
To create a new reference, either click on the New Reference icon, select References > New on the menu bar, or use CTRL-N. Once you have opened a new reference:
- Select a Reference Type (e.g. book, journal article) from the drop-down menu. This will ensure that the right fields appear.
- Type the details of the item into the appropriate fields of the record.
- Save the reference using the Save button, or by closing the record and selecting Yes on the dialog box asking if you wish to save.
More information is available in this guide under Adding References, including:
- Instructions for importing references from databases.
- How to enter details in EndNote fields to ensure your references display correctly.
- How to display group or corporate authors.
Imported references usually have some errors or inconsistencies and will need to be edited. Most of these references are usually automatically generated, and they may have been created using the rules of a referencing style different to your preferred style. The tips for manual reference entries will help you edit your imported references as well.
The output style in EndNote controls how your references are displayed in your library. You can choose to display the information you enter in a number of different referencing styles. For instance, APA 7th, Vancouver, or IEEE.
You will be able to preview how your references will look in Word (although note that you will need to choose your style within Word as well), and copy a formatted citation to your clipboard.
Select an output style in the menu bar under Tools > Output Styles, or using the output style drop-down menu at the bottom of your EndNote library's reference summary panel. This drop-down menu is circled in the image below.
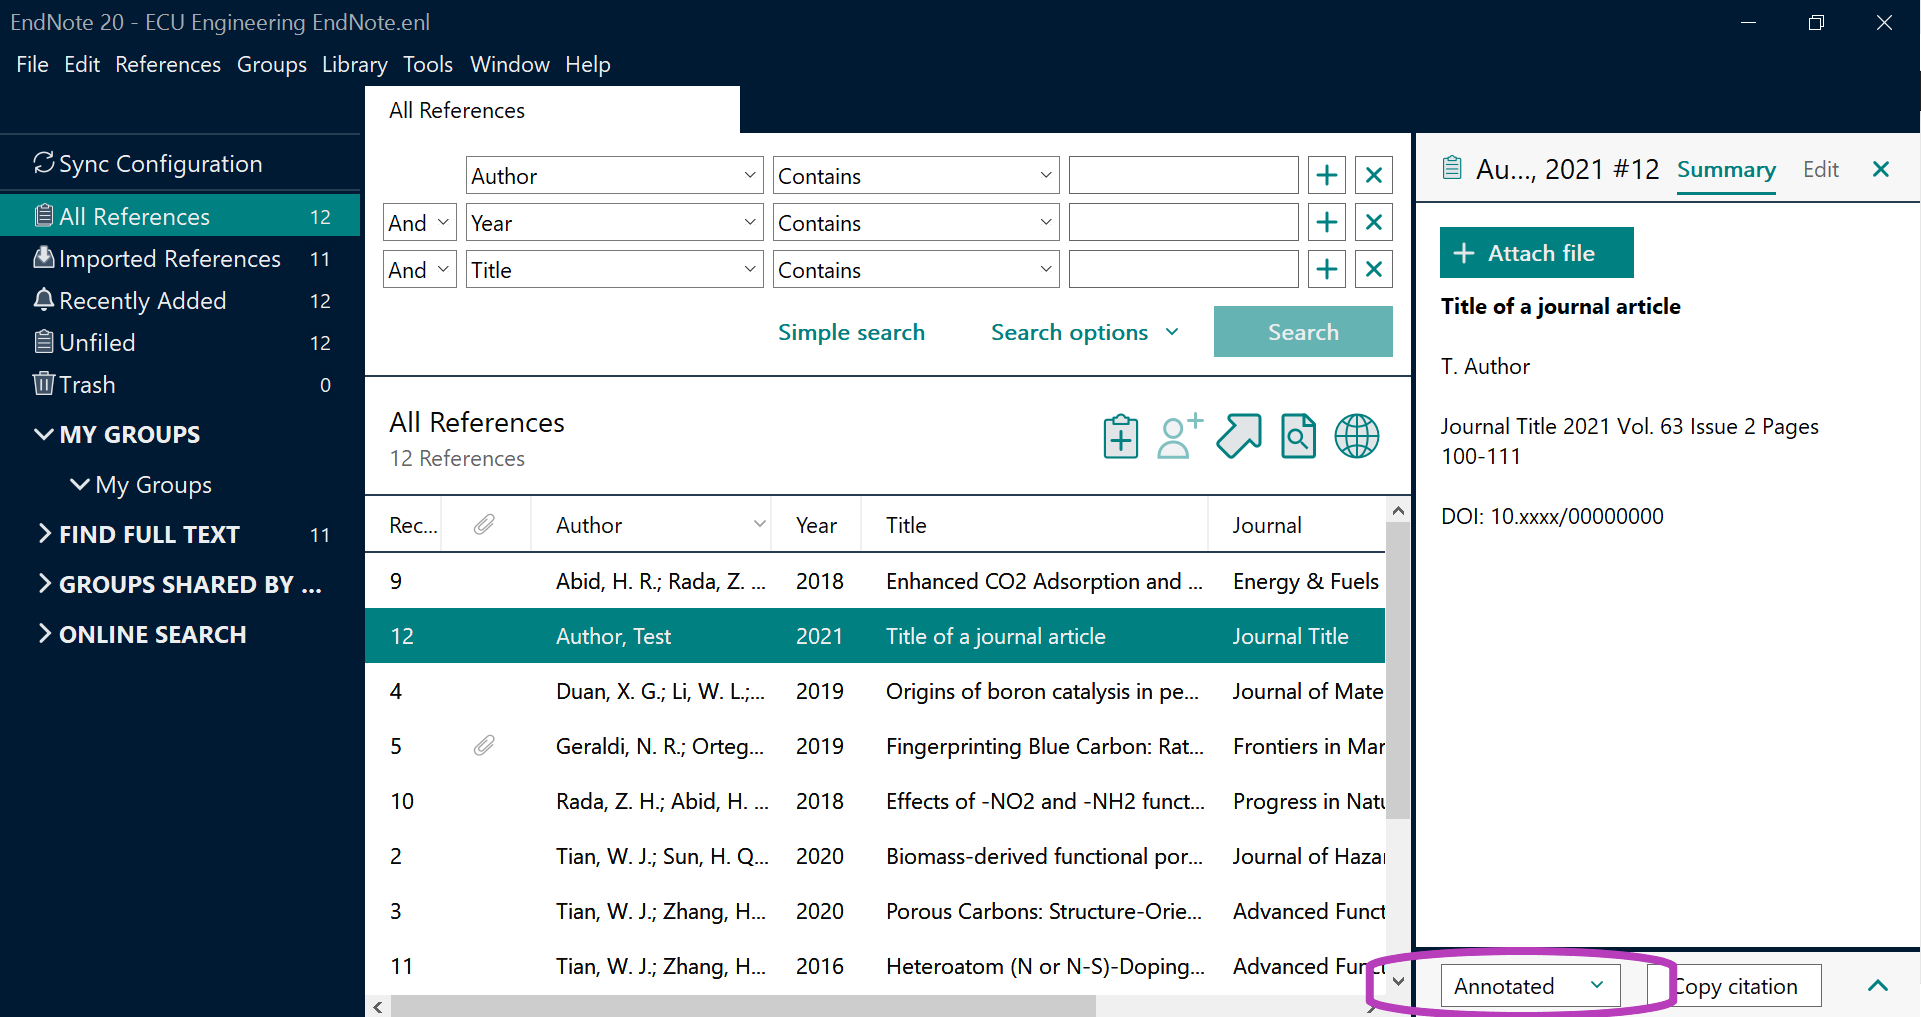
The default style is Annotated, and a number of common styles will be available under the drop-down menu.
If your desired output style is not already in the list of options, see the Referencing Output Styles page for more information.
To avoid losing your work, it is vitally important that you back up your EndNote library. If you are working on a project that depends on your EndNote library, you should make multiple copies and keep them in different places, e.g. USB or external hard drive and a cloud drive.
The backup form of your EndNote library is called a compressed library. If your EndNote library is saved as a compressed library, all of the files EndNote needs to load your library (the references in your EndNote library, plus data files such as groups and attached documents) will be saved.
To create a compressed backup:
- Go to File > Compress Library (.enlx).
Follow the prompts to save your library: Create, either with or without file attachments (such as your PDFs and annotations), and either the whole library or a single group. - Make sure you choose a meaningful name. This should usually include at least:
- the name of your library, and
- the date you saved the backup copy.
This will ensure you can find the backup when you need it and you know which backup version is the most recent, or the one created before some vital information was deleted. - The .enlx compressed file can be stored safely on a network or cloud drive, unlike your active library.
You should continue to use your original library. This backup will preserve a copy of your library to restore in case of data loss or file corruption.
Next Steps
Our workshop recordings and EndNote 20 workbook demonstrate how to use EndNote to add citations within your Word documents.
The rest of this guide can help you learn to use EndNote more confidently:
EndNote Online explains how to use the web version of EndNote to sync your library for use across multiple computers or to collaborate with other users in a shared library.
Term Lists & Journal Abbreviations explains how term lists are used in EndNote. Term lists help you maintain consistency in author names, and are useful to understand if you switch between referencing styles with different journal formatting requirements, e.g. APA & Vancouver.
Referencing Output Styles shows you how to download and install new referencing styles.
EndNote Help and Workshops & Online Tutorials bring together more resources to help you learn to use EndNote or troubleshoot your EndNote issues. Some of these resources rely on your having a basic understanding of EndNote, so if you haven't been to a library workshop or checked out our EndNote 20 workbook yet, take a look at those first.
EndNote for Law shows you how to alter EndNote to better fit the requirements of legal citation using AGLC4 style.